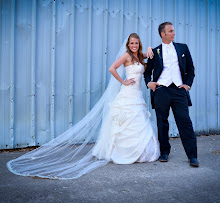
I love Pinterest. Seriously, I have gotten extremely inspired by some of the things I have seen whether it is a project, a decorating idea or baby nursery ideas. Jason went out of town in the beginning of January and I decided that I wanted to make him a little surprise while he was gone. As many of you know, Jason is a wonderful photographer. It has come in handy because we have so many beautiful pictures to choose from to decorate our new home. I decided that I wanted to take some of the pictures that he has taken and that I would make them into coasters for our living room. We got brand new furniture and I didn't want it to be ruined, after all. Why not have really nice pictures to look at that also serve a purpose? So, I was on a mission to get them done in one evening.
I recruited my Mom so she could come shopping with me although I was adamant that she didn't help me while actually making the coasters (except for spraying the sealer at the very end since it had a warning for pregnant women). The whole project cost me about $30 and I absolutely love them.
Here is what we did:
1. First we picked out the pictures we wanted to use and printed them out.
2. We went to Hobby Lobby and got antique modge podge, clear acrylic spray, felt, waterproof craft glue and craft sponge applicators.
3. We went to Home Depot and picked out bathroom tiles. I chose the mint green clear ones that are decorative tiles because I wanted all of the sides to be smooth. They cost almost $3 a tile but were totally worth it though you could get much cheaper tiles if you don't care too much.
4. We laid out padding so we didn't ruin the kitchen table. Newspaper would work too.
5. I took the craft sponge and modge podged the tile and placed the picture on the tile. Then I modge podged a thin layer over the picture making strokes in one direction. I let it dry for about 15 minutes or until it was no longer sticky.
6. Once dry, I went over the tile in the opposite direction with the modge podge for texture and so it looked more like a canvas. I repeated this step 3-4 times, alternating directions, so the picture is on really good then I let them dry.
7. Once completely dry, my Mom took them outside and sprayed them with the clear acrylic spray. We coated them 2-3 times, letting it dry for a few minutes in between each coat. Then we let them dry completely for 24-48 hours.
8. The following day I took the waterproof craft glue and glued the felt to the bottom of each coaster. I glued a complete square but you could also do four little circles if you wanted. Then I let the glue dry completely for 24 hours.
9. There you have it, gorgeous coasters from our travels all over the world. :)
I love them!! I can't wait to start my next little pinterest project. So much fun!! xx


No comments:
Post a Comment